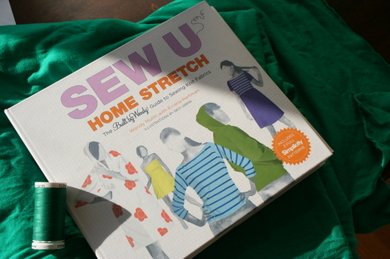
Sew U Home Stretch came home from the bookstore with me a couple of weeks ago. I read it right away and got pumped up to sew knits. My experience with knits is non-existent and this book explains it all. I felt educated and empowered so I went off to the fabric store and bought myself some green cotton jersey to make a dress.
Then I read the pattern.
OK, so I probably should have done that before buying the fabric. I know, I know. After realizing that the dress has some trickier things (facings, etc.) and guessing that my first knit garment may not be my best work, I changed my plan. I decided to make a shirt.
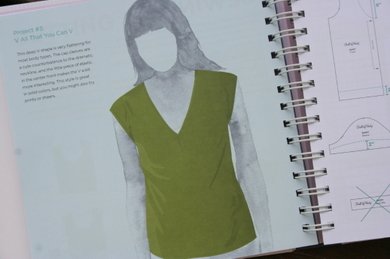
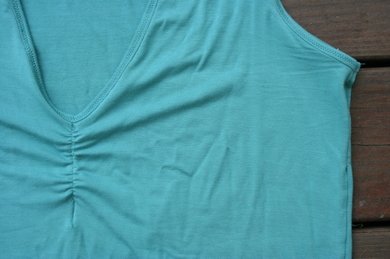
Here's where it gets fun. Wendy shows you how to make changes to the basic t-shirt, raglan and dress patterns to make different garments. I was immediately drawn to this shirt:
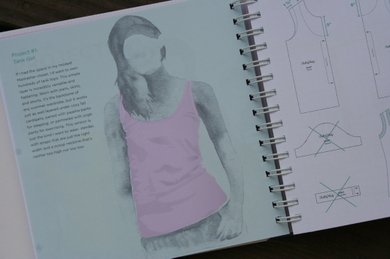
I liked the v-neck and the little gathered bit at the bust. I didn't like the sleeves, though. I know from experience that they don't really suit me. I flipped through the book more and came upon the basic tank.
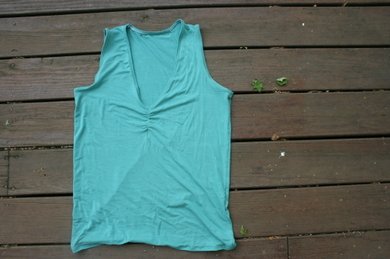
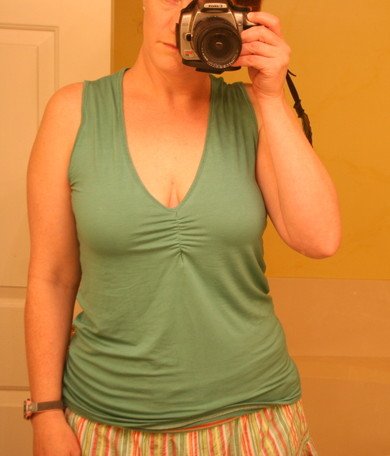
This pattern calls for ribbing which I didn't have on hand. For a second I contemplated going out to find some, but then the light bulb went off. It was so bright, I swear you could actually see it in the bubble above my head. I got out the tracing paper and made my own pattern, combining these two tops to make my very first knit tank. Yup...Built by Erin.
Feeling part genius and part sewing geek, I got it done. I would be lying to you if I said it was smooth sailing. It wasn't. But, boy oh boy, I learned A LOT. First, altering patterns is rather easy. I invested in a french curve to help with this step - this is crucial. It makes it soooo much easier. I followed the shirt pattern and made the deep V and added 2 inches length. I then followed the tank pattern and adjusted the armhole. Second lesson learned: check the size. I knew from Melissa's post that the t-shirt pattern that comes with the book runs big. I pulled out a tank that fits me well and held it up to the pattern. It was hard to believe, but it looked like I would need to cut out a size small (in store bought t-shirts, I wear a large). Third: knits are hard to cut out. This one is a rayon, cotton, lycra blend. Super soft, a bit stretch with a lot of drape. The drape made it hard to lay smooth and after about twenty minutes of fiddling with it, I got the two pieces cut out. All this before I even started sewing!
When I moved the fabric to the sewing machine(s), I realized I had missed a crucial bit. The neck and arm edges are bound, much like a quilt. Back to the scraps I went and managed to eek out just enough to cut 1 inch strips to take care of that. I used my serger as much as I could, but there were some bits that needed the regular sewing machine, too. I had to move my aqua thread back and forth. Next time I am going to buy two spools because it was a pain and a huge waste of time to re-thread both machines multiple times.
The little gathered bit is done by sewing elastic on the reverse side and pulling it as you go. It took me three tries even though I first did it successfully on a scrap. Besides making me cuss like a sailor, ripping out that elastic twice left some tiny holes in the fabric. Bummer. I almost gave up, but plowed on. They are tiny so if I didn't tell you, I'm not sure you would notice. The binding part was easy enough - I first tried to attach it with a straight stitch, but it looked super sloppy and it didn't catch everything in back so I switched to a zig zag. I think it looks mighty fine.
The fit? Well, when I tried it on the first time, it had big gapes under the arms so I took that in about an inch on each side. The V is a bit too deep for my comfort level. I think I would make it about 1/2" less than I did. It is too long - I don't think I needed to add the length which is unusual because I have a long torso. It is tight around my hips - making it shorter would take care of that, too.
So will I wear it? Yes. Probably as pajamas (it is comfy!) or to the pool over my swim suit. And I will make it again - trying to adjust the fit to make it better. I can see this being a summer wardrobe staple. So now, time for the dress. I'll let you know how that works out.
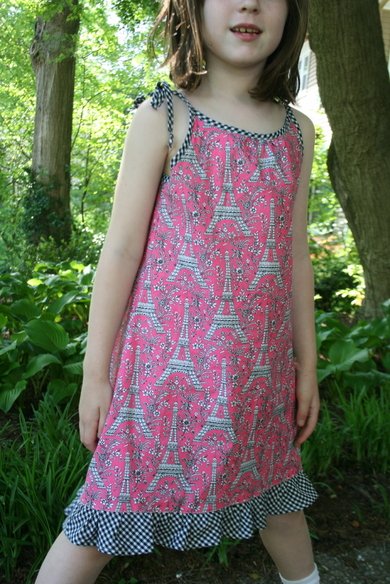
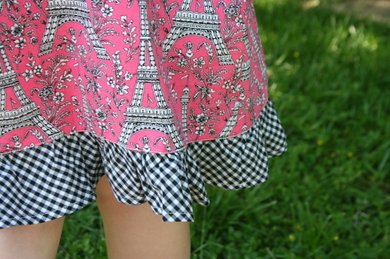
Here's the full reveal on the pink toile number from yesterday's post.
After I made the p.j. pants for the girls, I really wanted to give a nightgown a go. My girls sleep in tank tops and sleeveless nightgowns in the hot summer months and it is hard to find nightgowns of the non-cheesy, non-licensed character variety. Kate picked the pink Eiffel Tower fabric out of my stash - it was a great choice. I had enough yardage AND had forgotten it was in there. That girl can always find the pink! I paired the black and white gingham with it.
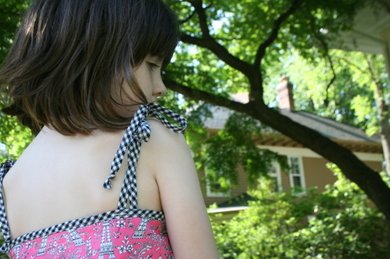
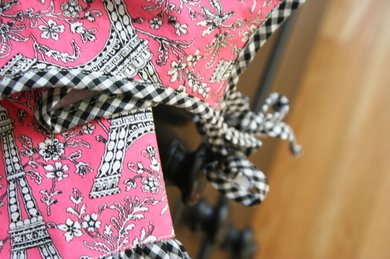
I traced a nightgown that we have, added seam allowances and cut it out. Two quick seams with the serger and it was time for the bias tape. I cut 1.5" strips on the bias and made my own using one of those nifty Clover tools. So easy. Really. Then I sewed it on. I use the same method that Amy does - fast and pin free. I left the straps long and tied them at the shoulders so it can grow with her.
My original plan was to sew a simple hem, but the nightgown wouldn't have it. It needed a ruffle. So a ruffle it got. In my opinion, it is pretty dang cute. For the record, Kate thinks so too.
When Kate tried on the nightgown, it became a dress. She doesn't think it looks like a nightie. Fine by me. It's going to be perfect for summer - lightweight and breezy, easy to wear all day and all night. Because, honestly, more days than not, it is just easier to let her sleep in her clothes.
Despite being woken up about 15 minutes late, and having one crabby child who apparently did not sleep enough, I am all smiles this morning. This is what is doing it for me:
I sewed this little number up yesterday. I'll give you a full reveal after I get Kate to model.
I went on a three mile run, that turned into a two and a half mile jog. But it felt great to move and while my calf is a bit tight, it didn't hurt. Hooray!
I'm only wearing the wrist brace at night and for short periods during the day. It's not completely better, but it is progress.
Melissa is rocking the knits. And Martha is sewing a garment a day. Seriously good stuff by both of these ladies.
I'm going to jump in, too. While a garment a day is completely unrealistic, making a dress should be doable.
What are your crafty plans this week?
Thanks for all the pajama pant love! They were such a satisfying and fast project - I am sure there will be more. Maybe even some for me!
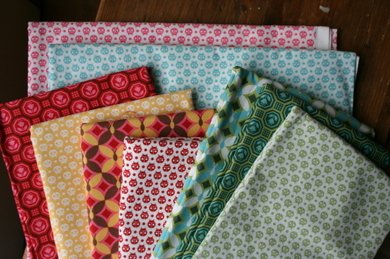
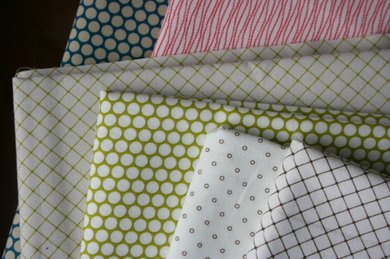
Many of you asked about the fabric I used for Jane's pair. I picked that up in Sarasota at Sew Worth It (thanks for telling me about that store, Celene!) along with some other goodies.
These are all part of Flutterby by Moda. The pink and aqua ladybugs were bought for p.j. pants (I told you the idea was floating around in there for awhile!) and the others are half yard cuts I am going to use in various patchwork projects. And maybe a skirt or two for the girls.
These beauties are part of the Cake Rock Beach collection by Joelle Hoverson, owner of Purl and Purl Patchwork in New York. I was very excited to see these in person as I am not sure that any of my local fabric stores will carry them! All of the prints are gorgeous with deep saturated colors - I have a feeling I will be ordering more of the collection from sometime soon.
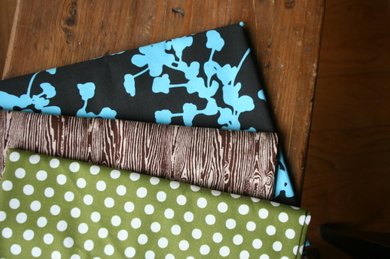
These last pieces are from different collections - an Amy Butler print, the Joel Dewberry woodgrain I have wanted for awhile and a green polka dot from Moda.
OK, then....not sure if I will be back tomorrow or next week. My right wrist is sporting a new accessory and it is really limiting my motions. I'll just have to see if there is anything crafty I can do. I'm thinking embroidery. If not, then I guess it is time to get caught up in a good book. Take care friends!
Sometimes I get an idea in my head and then I lose it. Just like Rachel said. Other times, it sticks and it won't go away. My latest project had been floating around in there for a long time. I completely and totally blame it on Leslie. You see, she made those lounge pants. My friend Suzanne saw that post and made her own. But Suzanne never uses a pattern. She wings it. She just traced a pair of pants she owned and made herself a pair. And then she made some for her girls.
There are plenty of things I can sew without a pattern. But when it comes to clothes, I am pattern follower. I don't sew many clothes - that is probably why. I used to sew dresses for the girls. I even made them some skirts and tops, but not so much any more. Jane got picky, I got my feelings hurt and lost the desire. Pajama pants, though....I thought Jane might just go for that.
On Sunday, I channeled my inner-Suzanne and traced a pair of Jane's flannel p.j. pants. I added seam allowances, and then tried to figure out how in the heck to fit a pair of girls' size 8 p.j. pants on one width of fabric. They just fit. Just.
I used my serger to stitch these up. FAST. Super FAST. Just how I like my projects. I added button holes on either side of the front center seam so I could add a mock ribbon tie. There is a full circle of elastic in the casing - each 12 inch length of ribbon is sewn to the elastic just inside the button holes. This way there is no chance of my-pants-won't-stay-up issues, but they still have that cute touch.
Jane was not very happy with the fabric choices. She sees all that fabric in the sewing room and thinks I can just make anything out of a fat quarter. Hmmm....that would be nice, but I needed 1 1/4 yards and the pickings were kind of slim. Not bad if you like say, green. Or pink. Just not much blue. Or red. The one I thought she would like, she didn't. Instead of listening to her whine, I just chose for her. I figured Kate would get two pairs if Jane never wore hers.
See, Kate is happy with almost anything. Well, anything pink, that is.
I wish I had enough red ric rac to trim the hem of Jane's pair, but oh well. I'm still going to call these a success. Jane has worn them two nights in a row. If that doesn't make them a winner, I don't know what does.
So you see, Leslie, it is your fault. In a roundabout, very good, inspiring kind of way. You, too, Suzanne. You, too.
Thank goodness for friends.
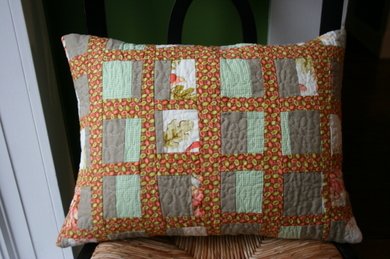
On Sunday, I made a pillow for a long overdue swap. I pieced strips of linen with strips of a floral and gingham with the intent of making a striped patchwork pillow. Once everything was pieced, I didn't really like it so I cut the piece into more strips and added the dotted print. I finished that up, still wasn't crazy about it so I cut it again and added more dots.
Finally happy with the piecing, I quilted the front with back to back loopy lines and threw it in the wash. After it was dried, I cut it to size and made the back. I put in a zipper if you were wondering....and, for the record, I had to consult my own tutorial because it has been awhile, ahem, since I have done the zipper thing.
We are getting ready to go south for spring break. I will probably post some, but not a whole lot while we are gone. Just wanted you all to know in case it gets really quiet in this space. See you soon.
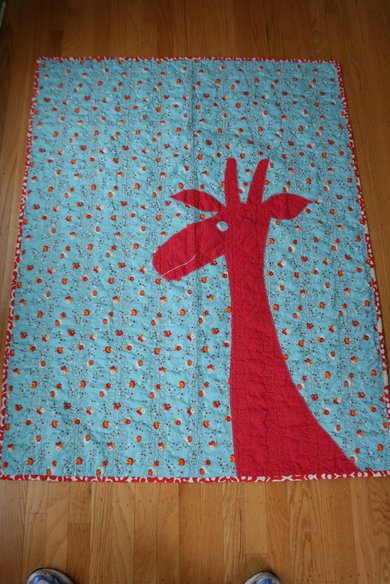
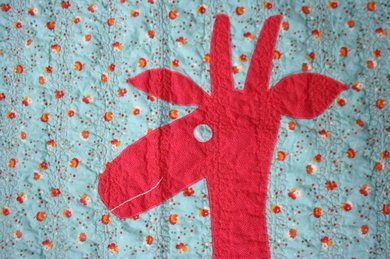
I finished the giraffe quilt on Friday night. Yes, a giraffe. I think she is pretty cute.
Taking photos of quilts is kind of hard. Maybe even worse than taking photos of windows. I am just saying.
I made the applique the same way I did on the elephant - lots of Wonder Under. On this quilt, I embroidered the mouth, though. It is kind of hard to see in the photos though. Trust me when I say that it adds to the charm.
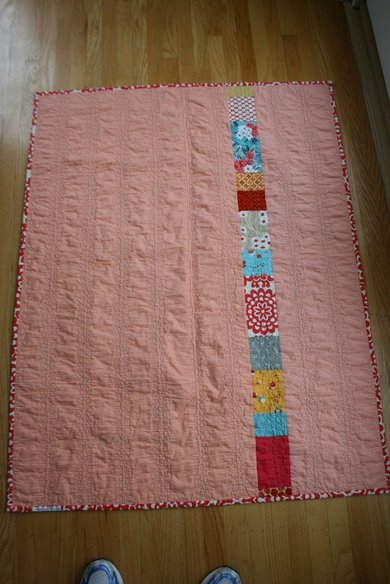
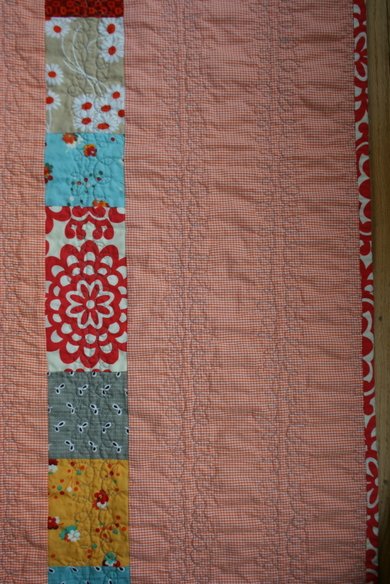
The backing was made with a patchwork strip on purpose this time. The orange gingham is 60 inches wide so I didn't need to add it. But I really had to have it. It is my favorite part. I dig the back side so much that I think I may make a similar one with the strip on the front. I also love how the stripes of free motion quilting make the fabriclook kind of like seersucker after I washed it. Another happy accident in my mind.
I know many of you told me not to use different thread colors for the quilting. I didn't listen. There is a bit of orange thread pulling through to the back, but I am OK with it. Because the gingham is orange, it is not so noticeable. I think the key is having the top thread match the backing fabric here....if I couldn't do that, I think I would have just used the same thread on top and bottom.
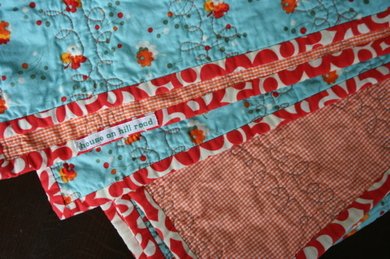
I added a little house on hill road tag to the back corner of the binding. Tomorrow I am going to fold this up nicely, wrap it lovingly and send it off to a new baby. Then I am going to start planning my next quilt(s) and think about actually quilting the string x one. Against my better judgement, I think I am going to tackle that one myself.

